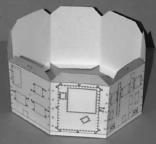
- Score along the inner edges of the tabs, as well as on the lines that separate each individual side panel.
- Glue the two side panel sections together to make a ring, making sure that the tab that says "to +x" is glued to the panel labled +x, and so on for +y, -y, and -z.

- While the spacecraft components are not used directly for research, they do provide vital suport for the mission, by keeping the electronics working right, making sure each instrument gets the right amount of electricity, and things of that nature.
- Each component is assembled like the boxes shown on the separate handout, so you will get a lot of practice making boxes!

- Since the side panels are relatively quick to construct, your teacher may want you to assemble the body of the spacecraft.
- To attach the side panels to the -Z (bottom) panel, match the axes (+ and - X and Y). This means that you should glue the +X tab to the +X space on the bottom panel, and so on for the other tabs.
- When you have finished gluing the side panels to the bottom, the model should look like the picture above.
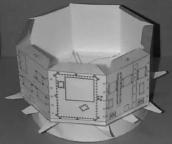
- The process for attaching the +Z (top) panels to the side panels is the same. Be very careful with the MAG booms and solar panels, though -- it's easy to bend the MAG booms, which are fragile, and they're not easy to un-bend. The best way to avoid that is to put the top panel on your desk or lab table and glue the side panels to it, rather than trying to place the top panel on the side panels.
- Also, when attaching the side panels to the top panel, you should be aware that two of the top panel's sides are shorter than the side panel, and two are longer. Just make sure that the tabs from the side panel are glued inside the dotted lines of the top panel, and you should be all right.
- After the spacecraft body is glued together, you can start gluing the spacecraft components into place. Match the label of the component with the label on the body, and try to glue the component in place so that the lines all match up.